Windscreen Fairing #3

Time: 4 Hours

So the Fairing was cured for 3 days since I had to fly for work. I peeled the ply off and reveled a fairly smooth surface and was happy. Ok let see if we can get this thing open…nope! I worked for 3 hours pulling and prying with no luck. I ended up using a carefully placed ratchet strap and a very thin plastic ruler sharpened on one end to cut the packing tape that was adhering to the windscreen. Finally with a slow motion it finally broke free with no damage. 

Wow am I happy! Ok so I needs to cut this down to the appropriate size. I removed the orange tape and packing tape and put down a new layer of painters tape. One at the aft edge of the canopy frame bar and one centered around 3″ from the bar. I then measured aft from the bar tape 3″ and made a mark. 

No I could close the canopy and use that 3″ mark to measure forward and place a mark on a piece of tape I put on the new fairing. 

Now I had a very accurate line in which to cut the new faring. I opened The canopy and lined the interior with plastic to protect from dust and used my Dremel cut off tool to cut the faring.

I left the cut about an 1/8″ long as I plan on adding two more layers, one E glass and one carbon, to the fairing to give it a little more structure. I sanded it all down so that I could start the work from the transition of the vertical piece to the horizontal piece. 

I really happy with the fit and shape so far. Still a ton of work to go to get this perfect but I’m on track. To strengthen the joint between the vertical and horizontal pieces I added a T-shaped layup. 

More work to come!

Windscreen Fairing #2

Time: 3 Hours

I sanded all the work I had already done to allow for the new work to adhere to it. The plane was to work on the fiberglass that goes vertical over the top and ties in the canopy to the windscreen. I asked my good friend, Lee a LanceAir builder, to come over and give me some pointers and help. After cleaning up the area we set out to get this done. Before we started I tied two lengths of rope to the canopy frame and ran them aft under the canopy skirts for later when the work had all cured to help with getting the canopy open. I also applied packing tape all over the canopy and put car wax on it to help with the release of the canopy later. To help with the gap between the canopy and windscreen I bridged the space with packing tape just catching the windscreen by a 1/16″-1/8″.  Lee then taught me the correct or easiest way to get the layers together and cut just right. First I cut three layers of E glass to a size larger than I wanted. Then I cut two layers of carbon fiber sheet to the same size. I also cut a piece of plastic sheet twice the size of the parts I just cut. I mixed up a good amount of resin, hardener and black pigment to apply to the strips. I poured it over the five layers that were laid out alternating between the fiberglass and the carbon fiber. These all laid on top of the plastic so that I had enough plastic left over to fold over on top of the strips. I themed used a hairspray can to roll the parts and squeeze any extra resin out. Now I had a nice flat sandwich of plastic, 5 layers of fiberglass/carbon fiber and plastic. I then used my rotary cutter to cut the final shape that I wanted through all the layers. I could then peel the top layer of plastic off and have an easy time applying the layup to the windscreen. Once in place I could just peel the other piece of plastic off and we were in business. Once in place I made some slight position adjustments to get it just right so that it wasn’t overlapping the orange tape. We then applied ply peel to get it to a smooth finish. 

So we will let that cure and see how it turns out, hope I can get the canopy open! 

More Canopy Skirt Work

Time: 3 Hours

I started back at the canopy skirts and the attempt to get them all smoothed out and looking presentable. First up was to fill all the rivet holes with micro and epoxy as well as the area around the canopy latch handle. 

After all of that setup and cured I sanded it al down smooth starting with 80 grit paper then 220 grit. I also sanded the invite skirt trying to remove all of the texture it came with. Once I was happy with that I applied 3 light coats of UV Smooth Primer to fill in any pin holes and imperfections. 

What’s the primer was dry I sanded it all down to get a fairly smooth surface. After that I cleaned up all the dust and taped off the canopy completely so that I could paint the skirts with gray filler primer to identify any low spots or pinholes. 

After three coats of filler primer I sanded with 400 grit sandpaper to get a smooth surface. When I was sanding I noticed a problem on the right side in the aft end.  As I was standing looking along the skirts I can see two rivet holes at the top moving as I applied pressure to the lower side. That’s not good and after careful inspection I noticed that the top of the canopy skirt was moving a little now, I went to the left side and noticed the exact same thing. It was mainly just two rivet holes on each side but the two holes on either side of those we’re also moving slightly for a total of eight rivets four on each side. After a discussion with Glenn we decided that most likely those four rivets, AACQ-4-4, were too short to go through the skirt, canopy and into the metal frame sufficiently. The fix? Well drill out the eight rivets clean up the holes, fill with epoxy/flox then redrill, countersink and rivet with longer AACQ-4-6 rivets.  So that I could redrill the holes I placed some painters tape and did the cross hair lines as I did before.  To prevent the epoxy/flox from going into the holes past the skirt I cut some card stock into strips and covered them with packing tape. I slid these in between the canopy and skirt and filled the holes. 

I ordered the longer rivets from Wicks Aircraft Supply as I didn’t have any on hand. One down side to this drilling out of these rivets is that the drill bit caught the black rubber bushings I made for the hole in the canopy and pulled them right out. I considered opening the holes up to 1/4″ and putting in new bushings but feared I would damage the canopy. So I decided that these eight hole would go without the bushings. Once the rivets arrived I re-riveted them and I’m a little happier with the fit. I think that I will cover these with a small strip of glass before finishing the surface. 

Windscreen Fairing #1

Time: 8 Hours

The windscreen needs a transition to the fuselage made with fiberglass. It also needs to create a transition from the windscreen to the canopy to close the gap between the two parts. This is a multi step process and a scary one as well. First up for me was to identify the dimensions of the fiberglass area and line that with some electrical tape. 

Now that I had the shape I wanted I needed to do some serious etching of the aluminum and windscreen where fiberglass will attach so that it will adhere better. I started with 220 grit to get rid of any shiny area then I followed it with 80 grit to really scratch all of the surface area. 

Keep in mind that all this time I have been working hard at not scratching my aluminum and canopy and now I go and do this step was pretty scary. The plan is to have a nice transition between the forward skin onto the windscreen. Vans calls for a 4″ radius to be a good for the curve between the two parts. To help with the void at the junction of the windscreen and skin I’m using a epoxy/flox mixture that will provide structural support and start the shaping. Since this application will be seen from inside the windscreen looking out I’m dying it black. I mixed up a batch and applied it to the area and built up the sides where the transition to the canopy skirts is off. 

After the filler cured I did some touch up sanding to knock down a few high points. I then cut seven strips of fiberglass at different widths starting at 1/2″ increasing in 1/4″ increments until I got to 2″. 

These were long enough to go from the left side to the right side of the froward edge of the windscreen. I prepped the cutting board with plastic and mixed up some epoxy with black pigment. 

I worked quickly and wet out each strip and placed in position starting with the 1/2″ and worked my way up. 

I covered all this area with ply peel to help with the surface and will let it cure over night. This is the first of several posts that will cover this process. 

Glare Shield

Time: 2 Hours

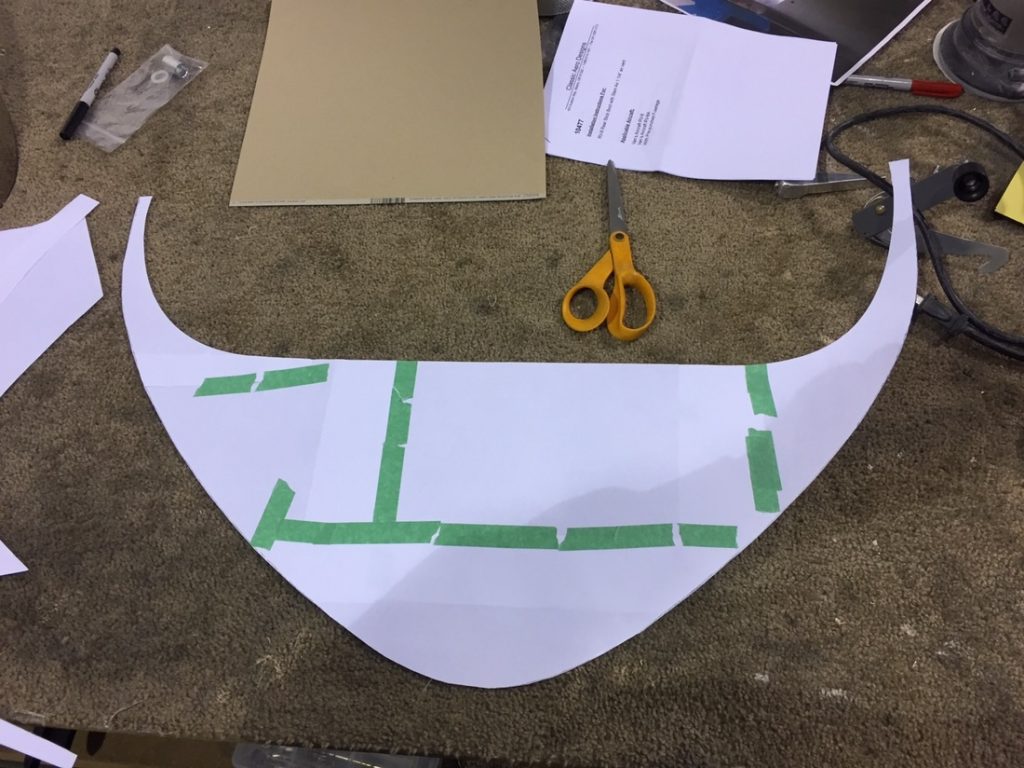
Under the windshield lies a section of the forward top skin that needs some form of treatment. Some builders just paint it flat black to help prevent glare. I decided to go one step farther and adhere a faux black leather similar to our Lear jets. This step needs done before I fiberglass the windscreen in permanently. I went to the local fabric store and found a nice black fabric that feels like leather with a little bit of padding built in. To start I needed a template for the space I would apply it. With the windscreen in place I traced the outer edge as it meets the top skin. Then I removed the windshield and began to make a paper template tracing the line I just made as well as the aft edge. 

Once I had all the lines drawn I cut the pattern out. 

With the template I traced/cut the fabric with my sharp rotary cutter and checked the fit. 

A little iron work is needed to smooth out the fold marks. After I got the wrinkles out I masked off the area that would get adhesive and scuffed the skin. 

I then cleaned the surface good and sprayed the 3M contact cement on the skin and the back of the fabric. 

After a few minutes to let both sides get tacky I laid the fabric in place. Luckily this cement is forgiving and allows you to lift and move as needed before getting stuck. 

Wow I love how this looks and I’m real pleased with how easy it was to put on. I cleaned up the windsreen and put it back in place so that I could make sure all the fabric was inside the line. I had just a couple of spots that needed trimming with a sharp razor. 

After the windscreen fiberglass is all done I will decide if I need to do anything with the junction between the windscreen and fabric on the inside.