Time: 10 Hours
This weekend was another big milestone – I removed the wings! These won’t go back on until the paint is done. To prep for this task I had just a few items to take care of. The first was to drill all the holes that hold the wing/fuselage flashing on to a #19 for the eventual screws that will go there. Then I removed the flaps and ailerons to make the wings a little lighter for lifting.


Then with a couple of hits to the temporary bolts that were holding the wing spar along with Glenn moving the tip of the wing up and down to take pressure off the bolts they slid right out. We then lifted them off the fuselage and put them back in their cradle for the remainder of work needed on them.

 Wow that was fun and I have so much more room to work now! One of the avionics I will have in my instrument panel is the Garmin GTN-625. This is a certified GPS navigation source and is the little brother to the 650. The only difference is that it doesn’t have the COM/NAV portion like the 650. All I wanted was the GPS enroute and approach capabilities. I have two Dynon radios and I will never do an ILS or VOR approach in this plane since RVAV/GPS approaches are all over the place. Plus I didn’t want to put any mor antanaes on the plane. I won’t buy this unit until I’m all done but I did want to wire it now. There are three things that I needed for this. First is the tray that the unit will actually slide into and supports the unit. The second is the backplate which houses all the connections and the third is the connector kit that allows you to run wires to the backplate. I got these from JA Air in KARR where I fly out of. They had the tray but had to order the rest for me.


So I moved on to attaching the tray to the instrument panel. It will be connected with four screws that will go into the brackets that SteinAir gave me when they cut the panel. I drill them for four #6 nutplates for the screws to go into.

 I squeezed a few rivets and the nutplates were done.

I test fit the tray to make sure all was well and it looked great.


Now that the panel was all done I was able to paint it for its final install. When the paint was dry I screwed in the Garmin tray and put them both back in the RV.


I then decided to do a little wiring one was to remove the ARINC harness that I had originally built and run from the module up to the panel area. The reason is that SteinAir recommended sheilded wire which I didn’t use.
 So I rebuilt it with the correct wires, 22g two conductor wires. One for the TX set of wires, one for the RX set of wires and one for the serial line. While I was up messing with the wires behind the panel I decided to clean up the two Dynon screen harnesses. I have one for the 10″ and one for the 7″ screen. There were a few sets of wires that I wasn’t sure I would use or not so I just left it all hanging for the time being. They leave wires for contactor inputs if you so desire, all mine will be going through the VP-X so I won’t need them. The other set was for another serial input and those won’t be needed either. The last wire was for dimming capability from an outside dimmer control that I wasn’t going to use. So I gathered up all those wires and made a tight coil and zip tied them to just hang behind the screens after the install. I also zip tied the rest of the harness wires to clean them up leaving the GPS antanae wires out. I decided to terminate these wires in a connector so that when I finally decide where I will put the antanae I can just run the wires to the pane and plug it in.


Now all that needs to be connected to these harnesses is the backup battery’s and the USB ports. It always seems that when I’m working on a task I see other items in that area that I want to work on. This was the same here as I was standing on the left side of the fuselage by the panel. When I installed the ELT remote head with tiny screws and nuts a while ago I didn’t think that I would ever have to remove that this after the RV was finished, but I found out that those part has a battery in it (I thought the one in the speaker housing was it). The possibility of getting those little nuts in place in the blind would be impossible. So as I sat there looking at he back of the panel I had an idea. These 4-40 screws are small and don’t need to be very tight. I decided to grab some 1/8″ thick bar and cut two small peices, one for the left side of the ELT opening and one for the right. I drilled and tapped them using the ELT holes and used some of my T-88 structural adhesive to bond them to the back of the panel side peice. Now to remove the ELT remote I will just have to unscrew the screws from the front and not worry about nuts on the back.


 I was still in the mood for wiring, and not sanding fiberglass, so another task that I had been putting off was the roll trim motor wiring and install I will have pitch trim which is in the left elevator and roll trim which is in the floor just by my left hip as I sit down. There are five small 26g wires for each of the trim servos. Two are for the movement wither in or out based on which wire is getting power. The other three are for the trim indication, mine will be a widget on the Dynon screen that gets produced by the EMS(Engine Monitoring System) which has a bunch of blank inputs that you can use for items like this. To connect these tiny wires as they get to the servos I’m using RC aircraft/car micro connectors that Glenn used on his. The current that these carry is really low so these connectors work great. The down side is that they just have little prongs that stick out that you have to solder the wires on to. This meant that I would have to solder inside the fuselage bent over the edge. Glenn’s soldering clamps worked well for this. First up was to cut and drill the push tube based of the dimensions in the plans. This rod has two large cotter pins that act as points for springs attach to. Then the springs attach to the bottom of the control column tube. This rod slides into a bushing on one end and connects to the servo on the other with a pin. Then the rod moves left and right as needed but the springs allow the pilot to override the trim or just to use the controls when the trim isn’t working.

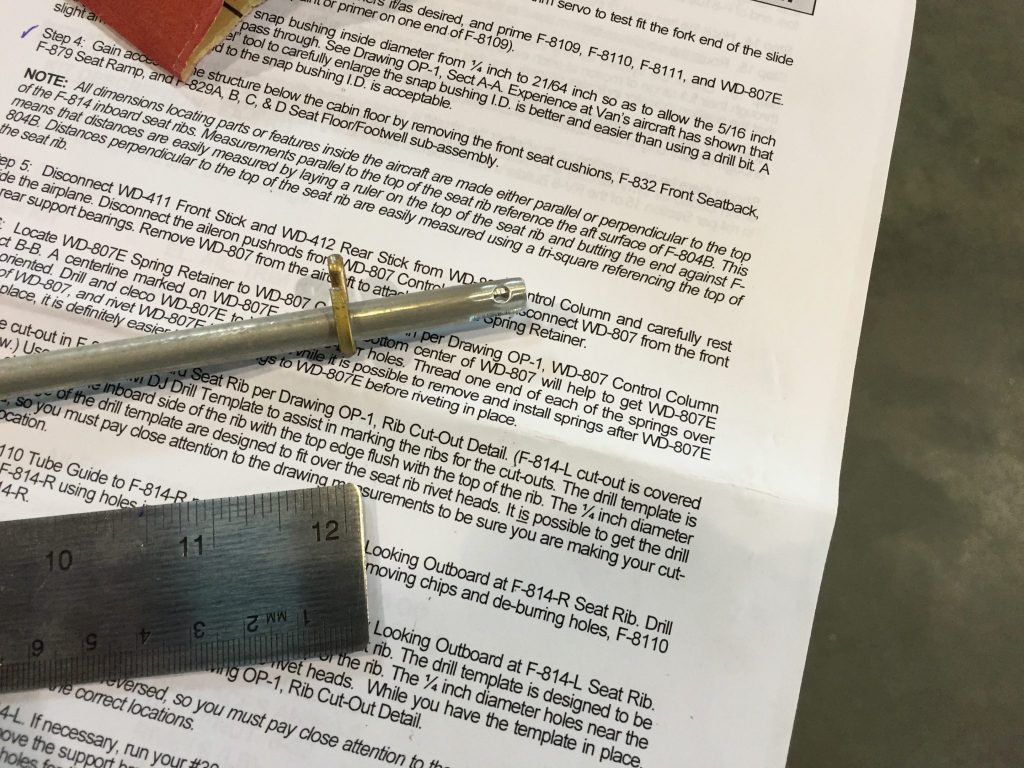
 I then test fit it all in place to make sure the movement was not binding.

 Then it was off to getting the connectors soldered. I made sure to put on shrink tube for the whole wire run, the shrink tube label and the small shrink tube to cover the individual soldered wires.


 I made sure to line the wires up on the servo so they matched the wire run and soldered them.

 With the wires all soldered I made the connection from the rod to the servo.


 I then cleaned up the elevator edges as well as sand and scuff the finerglass especially the flanges that would be riveted. Based on some other builders I planned on using structural adhesive to help bond the fiberglass to the elevators along with rivets.


